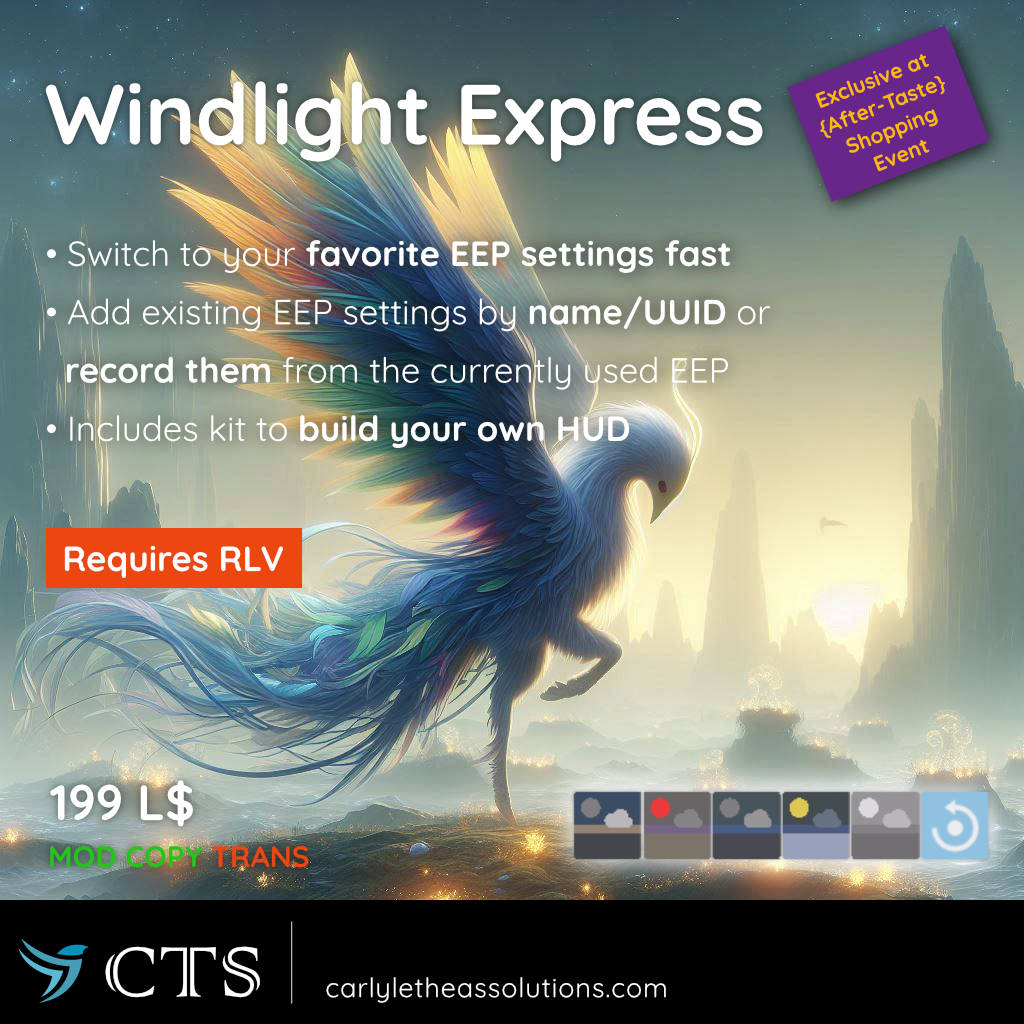
By default, the HUD has 5 slots, to which you can add your favorite EEP settings. To activate an EEP setting, simply click the respective button.
Add EEP settings either by name (for built-in viewer settings), by UUID for settings that you have in the "Settings" folder of your inventory, or you can record the currently active settings.
The package comes with a kit so you could assemble your own HUD with as few or many buttons as you like.
Exclusively available at the
{After-Taste} Sales Event.
How To Use
Preparations
-
This device requires RLV to work.
Use a RLV/RLVa viewer such as Firestorm, Catznip, Black Dragon, etc., and activate RLV. For instance, in Firestorm, this will be in Preferences > Firestorm > Allow Remote Scripted Viewer Controls (RLVa). -
Attach the Windlight Express HUD.
By default, it will attach to your bottom right HUD.
Adding EEP Settings
-
To add an EEP setting to a HUD button, long press the
respective button for about 2 seconds.
A menu will appear asking you how you would like to add the
setting (or if you would like to clear setting).
You have the following options:-
By Name/UUID
This will prompt you for a name of a built-in viewer setting or for the UUID of a setting that you have in your inventory. To get the UUID of an inventory setting, right click the setting in your inventory, and then click "Copy Asset UUID".
When adding by Name/UUID, the respective setting will be activated automatically. If nothing happens, you might have misspelled the name of the setting or entered an invalid name. -
Record EEP
This will read your current EEP setting.
-
By Name/UUID
- Once a setting has been saved on a button, click the button to switch to that EEP setting in your viewer.
- On the default HUD, the last button resets the EEP to the Shared Environment setting.
Building Your Own HUD
- Rez out the "ButtonSetting" object and while in edit mode, Shift+drag it to make a copy of it. Repeat for as many settings as you want on your HUD, and arrange the buttons to your liking.
- Optionally, rez out the "ButtonReset" object if you want your HUD to have a "Switch to Shared Environment" button, and align it to the other buttons.
- Create a regular cube for the HUD base, style it to your liking (e.g., apply the default transparent texture if you want to make it invisible) and arrange it above the buttons.
- Link the buttons: Click the first button object to select it, then hold down the Shift key and click each of the button objects in turn to add them to the selection. Select the HUD base last. Then press Ctrl+L to like the objects together. The HUD base should be highlighted in yellow.
- Add the "WindlightExpress" script to the linked object. It should be in your HUD base link.
- Attach your newly built HUD object to your HUD.